...
...
...
...
...
...
...
...
...
...
...
...
...
...
...
...
...
...
...
...
...
...
...
...
...
...
...
...
...
...
...
...
...
...
...
...
...
...
This articles how to configure you system to use the "check in" feature of the mobile app. Please note that this feature is support on select versions of the mobile apps as well as select home page layouts. Please ask your AppSuite representative if you are on a version that supports this.
Step 1: Enable the feature within the "Check-in settings" module, located in the Locations module:
Find the business => Program Administration=> location info module => Check-in settings

From here you should enable the feature by selecting "Check in enabled".
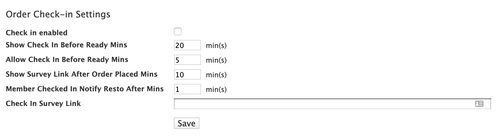
Show Check In Before Ready Mins - This is how many minutes before the order should be ready at that we will change the homepage screen on your mobile app.
Allow Check In Before Ready Mins - How many minutes before the order the customer will be able to check into a "spot"
Show Survey Link After Order Placed Mins - How many minutes after the order's status has changed to "Complete" (done from the CCP or the loyalty manager) that the customer will see the survey page
Member Checked In Notify Resto After Mins - How many minutes after the customer checks in that the restaurant will be notified if the status was not changed to "complete".
Check In Survey Link - The URL of the survey that the customer will fill out.
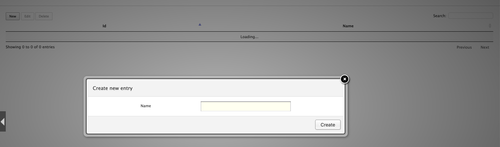
Step 2: Add "spots" that the members can check in for this location:
This module is located in the menu => "Check In Spots Module"
From here, click "new" and give the spot a name (ie. "Spot 1")
Step 3: Configure the notification templates for this feature:
This module is located in the Marketing => "Notification Template Module"
The templates that you will need to configure are:
Order delay warning - The notification sent to the restaurant when it's been longer than x minutes (configured in step 1) and the order has not been changed to "complete".
- In order to receive this notification you will need to be set up as a recipient in the "Notification Recipient Module" for email, phone, and/or voice on the "check in" related settings.
Order Ready for Pickup user notification - The notification sent to the customer when the status of the order is changed to "Ready for Pickup"
User check-in notification - The notification sent to the restaurant when the user checks in. NOTE: If you are using the Cloud PRNT - printers, it will print out a chit when the user check's in.
To enable the cloud print receipt, you need to enable that setting on the printer. (See this article for more info)
Step 4: Time to test by placing an online order at that location!
Once this feature is enabled, you can disable it by deselecting the "check in enabled" setting explained in step 1.
Step 4: Time to test by placing an online order at that location!
Once this feature is enabled, you can disable it by deselecting the "check in enabled" setting explained in step 1.
Related articles
| Filter by label (Content by label) | ||||||||||||||||||
|---|---|---|---|---|---|---|---|---|---|---|---|---|---|---|---|---|---|---|
|
| Page Properties | ||
|---|---|---|
| ||
|